


How to Make an Interactive Infographic [+Templates]
![How to Create Animated Infographics With Visme [Step-By-Step Guide]](https://visme.co/blog/wp-content/uploads/2016/02/Header-1200-1-500x280.gif)
Written by:
Chloe West

Infographics can be seen all over the web, whether they’re inside blog posts, company documents on social media or even in email newsletters.
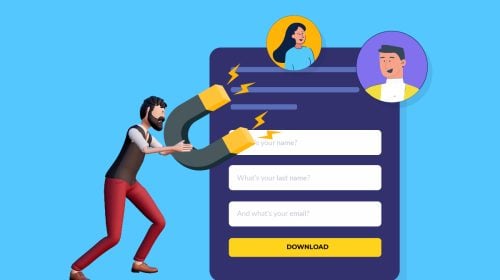
While infographics are definitely a successful tool for many things, from marketing to link building, you still want to make sure your infographics stand out. And a great way to do that is to create animated and interactive infographics that engage your target audience and grab their attention right off the bat
Adding elements like animation and interactivity to your infographic is the perfect way to not only engage your target audience, but quickly grab their attention right off the bat.
Most infographic tools make it easy to create your own stunning visuals within minutes, but few provide the means to add animation and interactivity.
With Visme, you can do both – create beautiful static infographics or animated infographics with animated illustrations and interactive elements like links, quizzes, surveys or even videos embedded right within the infographic.
In this quick step-by-step interactive infographics tutorial, we’ll show you how to easily create animated infographics with Visme that your audience is sure to love.
You can check out our quick, 5-minute infographic maker video tutorial to get a feel of how easy it is to create infographics with Visme.

First things first, create your very own Visme account for free. Just enter your email, name and password and you're ready to start creating an animated infographic.
Once you’ve logged into the Visme dashboard, click on the Create button at the top of your left sidebar.

Once you click Create, you’ll be able to view all of Visme’s thousands of interactive infographics templates. Our template library filter update provides even more ease for navigating through to find the exact template you need.
You can scroll through the Infographics tab, click the search bar to find various infographic categories or type in your search query to find relevant templates.
You also have the option to start with a blank canvas if you want to create a new design completely from scratch. The world is at your fingertips to do with what you will!
For the purposes of this tutorial, we’re going to use the 5-step animated infographic video template on Essentials for Starting a Startup.
Every one of our professionally designed templates are fully customizable, so you can change each bit of text, photo, chart, etc., to fit your content, rather than the placeholder content many of our templates include.
We’re going to update the text in our infographic to say “5 Types of Animation to Use In Visme.” Be sure to update text size accordingly so your design still looks perfect.

If you’re creating an interactive infographic with data or information that repeats across projects or project slides, use the dynamic fields feature to update all instances of a content snippet with one click.
Visme offers different types of animated graphics to add into your design to create an animated infographic.

You can use illustrations (choose from three different styles – flat, outline and isometric), characters (choose from a variety of poses), gestures, special effects, 3D graphics and more.

Every aspect of these graphics is completely customizable from the smallest detail to the skin color of your chosen character.
You can add these as visual elements within your infographic to help represent your point and choose how many times the animation repeats as well as how quickly it runs.

Each of Visme’s animated graphics is completely exclusive to our platform and has been custom designed by our in-house team of designers.
To quickly access our animated and interactive elements, use the Visme Shortcut to open a dialog where you can search for exactly what you need. Click on the forward slash (“/”) to get started.

Whether you’re creating a presentation, social media graphic, animated or interactive infographic, you’ll want to animate various elements of your design, like text boxes, icons and AI generated graphics that aren’t pre-animated.
Visme animation makes it easy by giving you access to 14 different types of enter and exit effects.

Just click on the object that you want to animate, click Actions, then Animate to view your options. Choose an enter animation type for elements that you want to stay on the page and an exit animation type for objects that you don’t mind flying off the canvas.

You can preview your design to see what the animation effects will look like.

Easily control the times your objects appear on stage by clicking the hamburger menu in the top left corner and selecting Show objects list to view the timeline.
Here, you can see at what time each element appears relative to others and you can easily move them to appear earlier or later. Keep in mind that the objects list only shows your selected content block’s objects, not the full infographic.
Need to showcase data and statistics in your animated infographic? Visme’s charts, graphs and data widgets come with automatic animations built in to make sure your numbers pop out at your audience.

There are a few different animation types to choose from for your charts so that you can find the most seamless animation to fit right into your project.
If your infographic is filled with charts and graphs to showcase tons of valuable information, be sure to keep a similar animation type throughout so the design is cohesive.
In Visme's infographic video maker, you can also have your chart values appear as users hover over your different bars, lines or pie pieces to add interactivity into your data visualizations.

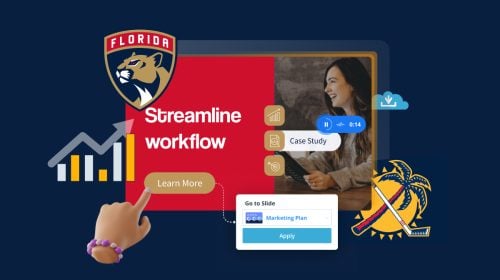
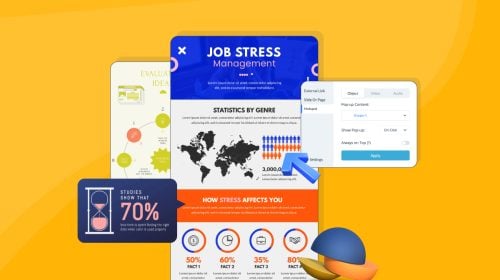
Visme’s animated infographics software has tons of features for creating interactive infographics. You can create interactive elements within your infographic by linking various objects together and creating pop-up or hover effects.
It’s so easy to do, and this will help you create interactive quizzes or Q&As within your infographics as well as high-quality designs like this grading diagram we created ranking top design tools.
To link elements within your infographic, click on the object you want to be clicked on or hovered over to make a second object appear.
Then click the Actions menu, click Link and then click the Pop-up option. You can then choose which object will appear when a user clicks on or hovers over your selected element.

Keep in mind that the objects receive generic names automatically when added to your video infographic.
By going to the hamburger menu in the top left corner and clicking Show objects list, you’re able to see these names as well as rename them so that you choose the correct linked object.

This type of animation and interactivity within your infographics can completely set your designs apart from a typical static infographic. Play around with all of the different ways you could create pop-up effects in your next infographic.
Another great way to add elements of animation and interactivity to your infographic is by embedding a video by using the Media or Apps tabs in the left sidebar in the editor.

The Media tab allows you to embed any type of online content as long as you have a URL or iframe code. Enterprise accounts even get access to embed HTML codes within their dashboard.
Furthermore, clicking Videos will let you browse through our library of stock videos to add to your infographic background or as an accent in your design.
The Apps tab allows you to link to various video apps (and more coming soon!), so you can just paste in a YouTube or Vimeo video right into your Visme. Beyond embedding videos, you can upload your own videos and record voiceovers right inside the Visme infographics editor.
Aside from linking objects to create pop-ups, you can also link out to external sites or even create links between blocks within your infographic. This is especially useful if you have a longer infographic with a lot of information.
Click on the object you want to link (like a social icon in your infographic’s footer), go to the Actions menu, click Link and then add your link in the Web tab.

As you can see, we linked to our home page in the footer of this infographic. You can choose whether or not you want your link to open in the same window or a new window as well, just like in regular blog posts and webpages.
Before finalizing your design, make sure you customize the fonts and colors (if you choose) to match your brand, your content or just your favorite colors.

Visme's animated infographic maker has hundreds of popular, free fonts to choose from as well as premade color themes that allow you to change the overall look and feel of your infographic with a single click. A Visme Brand Kit allows you to add in your own color themes as well.
Visme editor contains several AI tools to help you create amazing content your way. Generate unique images or graphics with the AI image generator. In the prompt, include brand details like colors, mood, and voice to get even better results.
Edit images with the AI Touch Up Tools; remove backgrounds, erase and replace objects, or unblur and upscale images.
Get help with your text and prompt the Visme AI writer to summarize, expand, proofread, outline or create content. Remember to take AI-generated text with a grain of salt and customize it to match your voice and message.
Now you know how to make animated infographics. It’s time to share your new animated masterpiece! The best way to do this and ensure that all of your animation and interactivity remains accessible is by embedding your infographic onto a blog post or webpage.
You can see how we embedded our design tools grading diagram in this blog post here to get an idea of what this will look like.
And you can also check out all of the animation and interactivity elements we added to the infographic we created throughout this blog post:
Visme also allows users to generate a public or private link to share their projects online, as well as download in a number of formats. Infographics can be downloaded as a PDF, JPG, PNG or HTML5.
HTML5 is an offline file format that still retains all of the animation and interactivity elements you built in the Visme editor and can be a useful option for many users.
Personalize animated infographics and send them via private links. Use these types of infographics as manuals, and training material and add the recipient's name and details to the design. To achieve this, use Visme’s dynamic fields feature where you can change a term, word or sentence across the entire infographic without having to mess with the design.
Do you still have questions about animated infographics? You’ll get the answers here.
An animated infographic is an informative visualization that incorporates motion into the design. Animated infographics can be static infographics that have had motion added to them. Or, they can be visualizations where the motion and movement help tell a story with the information.
Animated infographics are made of several types of animation.
Here’s a list:
Animated infographics and motion graphics are two different things even though they have similar names.
Mainly, the difference is that infographics are visualizations that help communicate information effectively. They’re typically used in content marketing efforts accompanying blogs, emails and landing pages as visual support for the text.
Motion graphics are visuals with movement that can stand alone or be part of a bigger design, like an animated infographic or an explainer video.
To create animated infographics, you need a design tool that offers animation options on top of all the classic design features. In our opinion, the best animated infographics maker is Visme.
You can look at the section above to learn about all the features that’ll help you create animated infographics with ease. Other tools include Venngage, Canva and Easel.ly.
Ready to get started creating your own animated infographics with Visme? Sign up for a free account to start playing with all of the design elements available to you and create your own animated masterpiece.
Design visual brand experiences for your business whether you are a seasoned designer or a total novice.
Try Visme for free


About the Author
Chloe West is the content marketing manager at Visme. Her experience in digital marketing includes everything from social media, blogging, email marketing to graphic design, strategy creation and implementation, and more. During her spare time, she enjoys exploring her home city of Charleston with her son.